The prototype lock is completed!
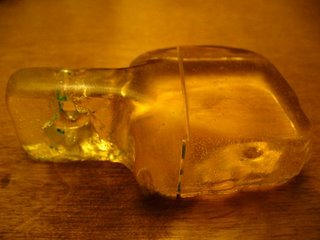 It took a bit of work to overcome my many mistakes, but I've completed the matching piece for the prototype lock. The saw marks you see on the piece is where I cut the rigid mold in half.

Here are the pieces locked together.
It has turned out more crudely than I expected, but I've learned some things along the way:
1) When making a rigid mold, make sure it can be split apart so removing the object is easier. I had to saw the mold in half in order to extract the second piece
2) Use quick-setting silicone mold catalyst instead of the 60 minute version. And mix properly. A lot of the silicone I poured never cured and stayed in a liquid form.

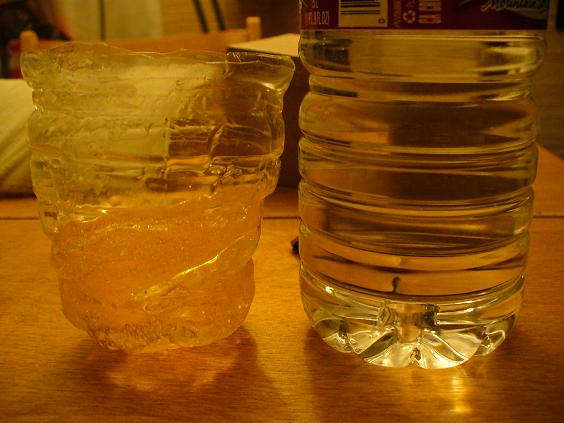
3) Epoxy resin generates a lot of heat when it's setting. Here's a shot of the bottom half of a water bottle that I mixed the epoxy in. If you look closely, you can see the large bubbles in the epoxy where the bottle's plastic melted. In retrospect, I was lucky not to get a larger leak and epoxy all over my table.
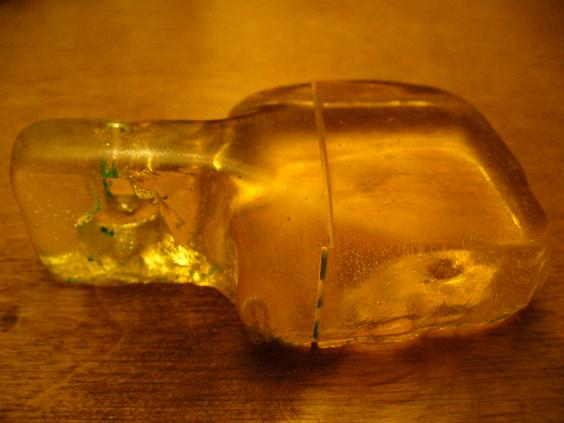
4) Epoxy is niiice. I used epoxy resin instead of the polyester resin from last time. It set with a nice hard shiny surface. What was strange was that the area above the keyhole didn't set at first. It seemed to be mostly resin. After I mixed a little hardener in, it cured properly. I must not have mixed the resin thoroughly enough. I can see where the part is because it's a lighter yellow after curing.
---
I went to the monthly Society of Janus orientation meeting this evening. I'm hoping that social support for kinky activities will help me feel better about myself.
 It took a bit of work to overcome my many mistakes, but I've completed the matching piece for the prototype lock. The saw marks you see on the piece is where I cut the rigid mold in half.
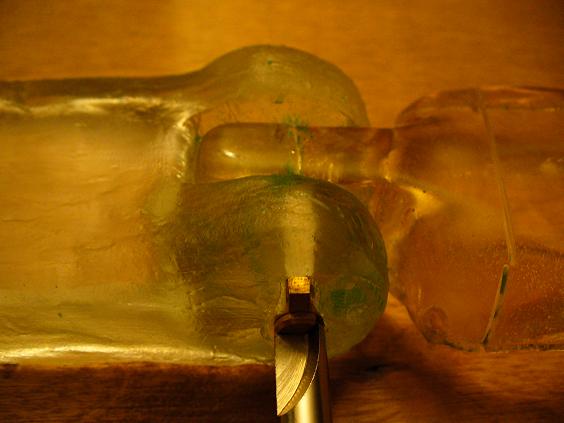
Here are the pieces locked together.
It has turned out more crudely than I expected, but I've learned some things along the way:
1) When making a rigid mold, make sure it can be split apart so removing the object is easier. I had to saw the mold in half in order to extract the second piece
2) Use quick-setting silicone mold catalyst instead of the 60 minute version. And mix properly. A lot of the silicone I poured never cured and stayed in a liquid form.
3) Epoxy resin generates a lot of heat when it's setting. Here's a shot of the bottom half of a water bottle that I mixed the epoxy in. If you look closely, you can see the large bubbles in the epoxy where the bottle's plastic melted. In retrospect, I was lucky not to get a larger leak and epoxy all over my table.
4) Epoxy is niiice. I used epoxy resin instead of the polyester resin from last time. It set with a nice hard shiny surface. What was strange was that the area above the keyhole didn't set at first. It seemed to be mostly resin. After I mixed a little hardener in, it cured properly. I must not have mixed the resin thoroughly enough. I can see where the part is because it's a lighter yellow after curing.
---
I went to the monthly Society of Janus orientation meeting this evening. I'm hoping that social support for kinky activities will help me feel better about myself.
posted by alphaxanon at 2:06 AM
![]()

0 Comments:
Post a Comment
<< Home